
Availability by home country
Notification auto-tracking is available for Singapore home-country profiles only. It is on hold elsewhere while more bank formats are supported. International users can still use manual entry, receipt scanning and supported Apple Wallet card-tap transactions with Amount and Merchant. Saved expenses and review items remain available.
- CaptureS$60Dinner payment
- ReviewOne billCheck the purchase
- SplitS$20Your share of three
Less typing, from purchase to split
The useful part is what happens after capture. Merchant, amount, currency and date can arrive together, ready to check. Keep a solo purchase in Personal, or use that same record to split dinner, groceries or a taxi. Category analytics then use your included share, rather than the whole amount you paid upfront.
Set up automatic tracking on Android
Notification tracking is available for Singapore home-country accounts; support elsewhere is coming soon. In Singapore, install the Android app and sign in, then keep payment alerts enabled in your selected bank or wallet app. AA split reads supported notifications without asking for bank credentials.
- Open Profile → Auto-track expenses, read the privacy explanation, then choose Choose my apps.
- Select the banking or wallet apps you want to track. Check each fallback currency: it is used when the alert does not identify one.
- Tap Enable on this phone. In Android Settings, allow notification access for AA split, then return to the app.
- Check the status. Ready for your next purchase means setup is connected; Waiting for Android to connect or Needs attention means there is another step to resolve.
- After your next supported payment alert, open Personal expenses and check its details. Use the review list for uncertain payments.
Set up automatic tracking on iPhone
Open Profile → Auto-track expenses. Apple Wallet card transactions are available on compatible iPhones in any supported home country when the card supplies Amount and Merchant. Bank-app and Wallet notification-text capture is currently available only for Singapore accounts. Apple Shortcuts passes the selected fields to AA split; the app does not read every notification or message.
- For Apple Wallet card payments on iOS 17 or later, choose the Wallet card-tap trigger. Your card must supply both Amount and Merchant.
- Add the ready-made Shortcut when offered. For manual setup on iOS 17–26, create a Transaction automation and select your cards. On iOS 27 or later, create a Shortcut, tap Edit, search Wallet and choose Wallet under Automation; select your cards or keep Any Card.
- For Wallet card transactions, add AA split – Wallet payments. For manual setup, select Wallet payment to AA split. Connect Amount to Transaction → Amount and Merchant to Transaction → Merchant. Never use a fixed amount or Ask Each Time.
- For Singapore payment notifications on iOS 27 or later, add AA split – Bank app alerts, open it, tap Edit and choose your apps. The Notification trigger and Bank app alert to AA split action are included. For manual setup, add both and connect Title, Subtitle, Body, Date and App. Use this method for Wallet notification text too.
- Choose Run Immediately or turn confirmation before running off where offered. If Notify When Run is available, you can turn it off. AA split cannot hide a banner that iOS requires.
- Use one automation per payment source to avoid duplicate alerts. After restarting the phone, unlock it once, then check the next supported purchase in Personal expenses.
Check what was captured
Supported purchases with clear details can be saved automatically. Uncertain amounts, possible duplicates and some person-to-person payments wait for review instead. Open Auto-track expenses and the review list, check the merchant, amount, currency, date and category, then choose Save as expense or remove the alert. A captured payment is not automatically a group repayment.
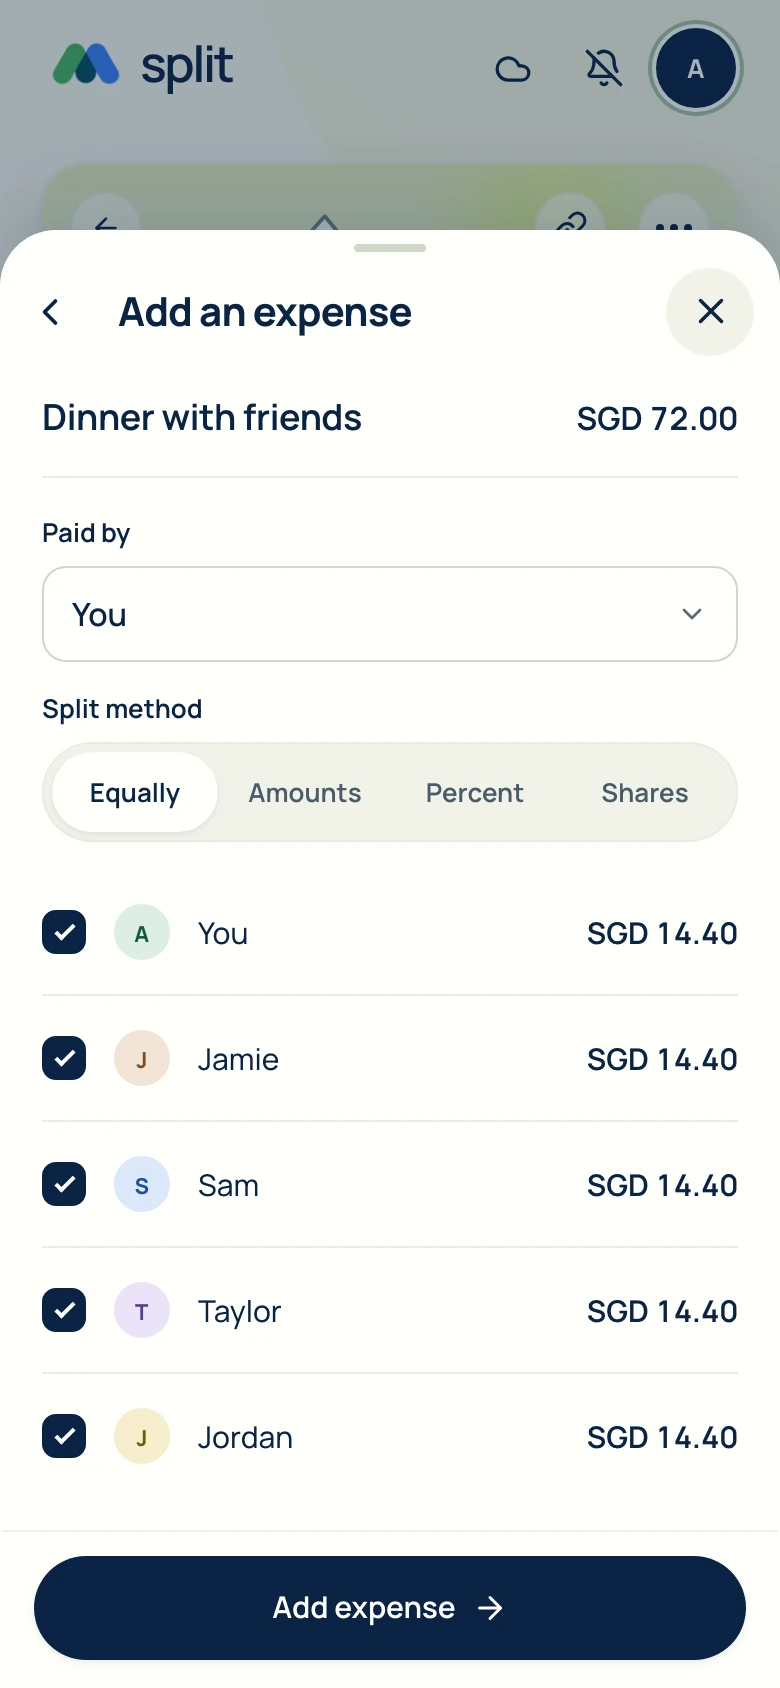
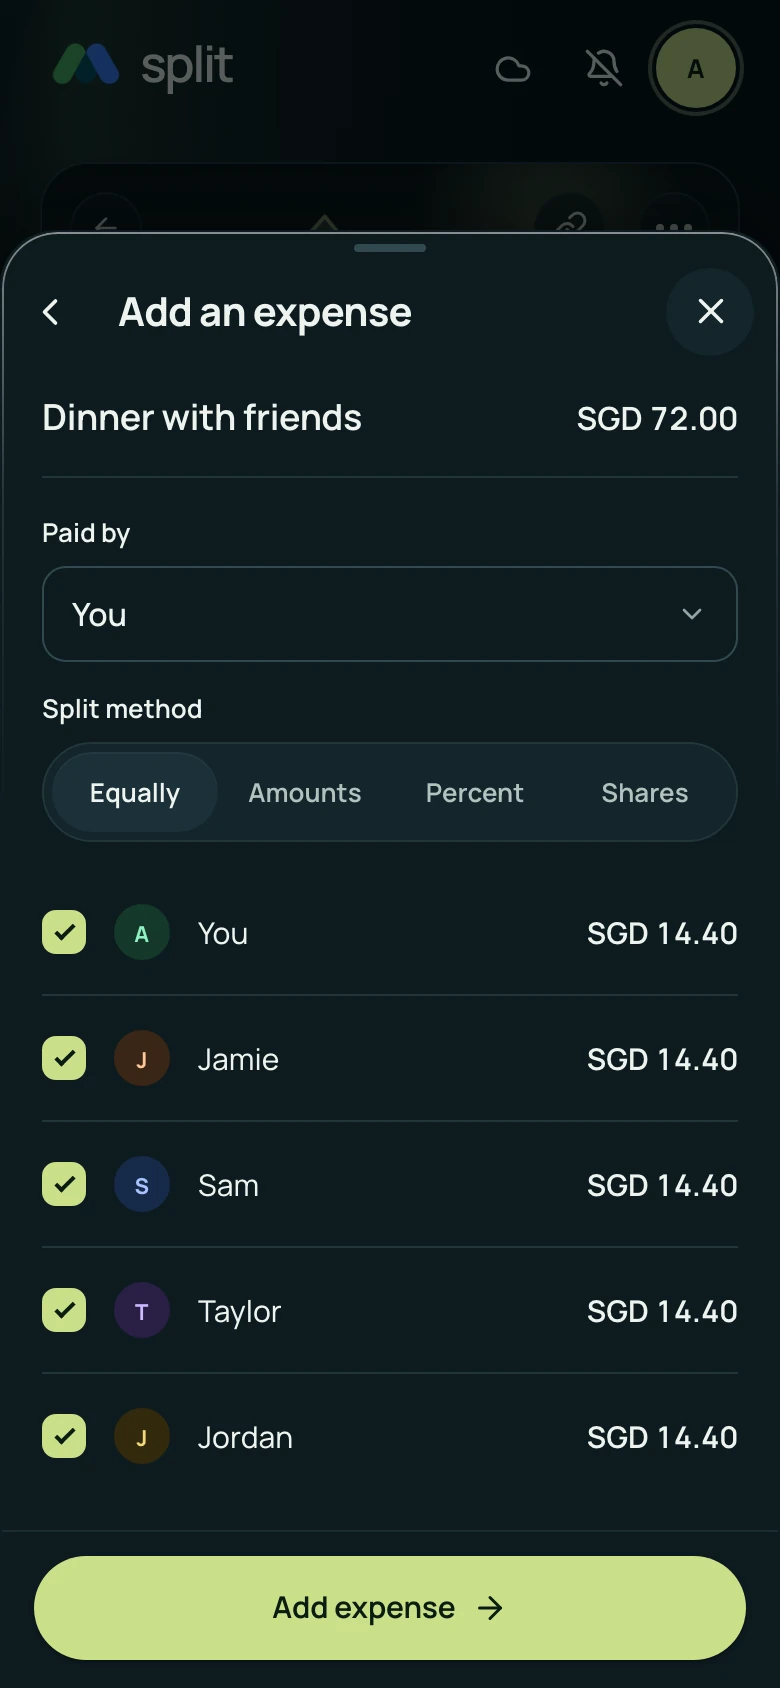
Equal shares for a taxi. Exact amounts for different orders. Check the people and amounts before saving.
Turn a captured expense into a split
Start from the saved expense; save any payment waiting for review first. Split bill offers two ways: Split total shares the amount, and Itemized splitting splits the receipt by item.
- Open the purchase in Personal expenses and choose Split bill.
- For Split total, choose a group or create one, then split equally or by exact amounts, percentages or weighted shares.
- For Itemized splitting, take a photo of the receipt. While it is read, choose a group or a one-time meal, then assign each item to the people who had it.
- Check who paid, who is included, the currency and every share. Choose Save split, or Save meal for a one-time meal, when the details are right.
- Review the group balance and your Personal view. The linked amount is accounted for through the saved bill; any unsplit remainder stays personal. Do not add the same purchase again as a separate expense.
Use the record to spot spending patterns
A more complete record makes the month easier to review. Check food, transport and other categories, correct a recurring misclassification, and compare spending across months. For a shared purchase, judge your own share rather than the amount you happened to pay. This can help you notice habits and choose a change; it does not guarantee savings or include purchases that were never captured.
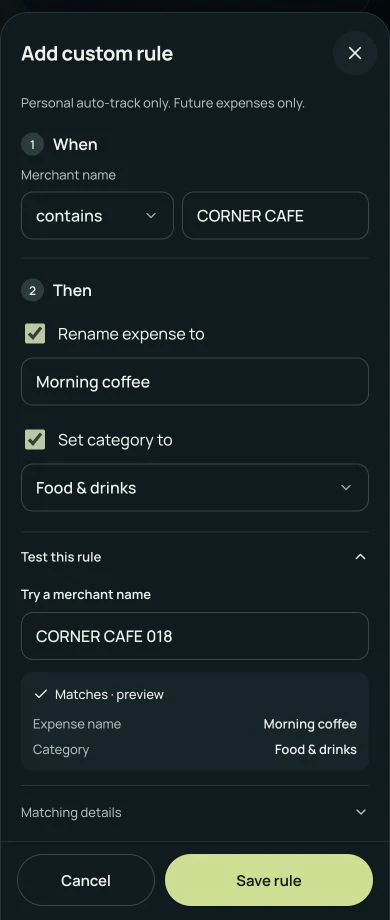 Actual app screen · sample rule
- Is exactly
- CORNER CAFEThe whole merchant name
- Contains
- CAFEAnywhere: CORNER CAFE 018
- Starts with
- CORNERAt the beginning: CORNER CAFE
- Ends with
- CAFEAt the end: CORNER CAFE
Personal auto-track only. Future expenses only.
How matching works
Letter case and extra spaces do not matter. Symbols are ordinary text; no coding or regex is needed. One matching rule applies to the original merchant name. An exact match wins, then the longest matching text. Ties use starts with, ends with, then contains.
Manual entries, group expenses and past expenses stay unchanged. Avoid broad payment labels such as HITPAY or PAYPAL if they cover different businesses.
Prefer help from AA assistant?
Try: When the merchant contains “CORNER CAFE”, rename it to “Morning coffee” and set category to “Food & drinks”.
Review the matching condition and actions, then choose Save rule. The assistant needs your confirmation. You can also create a rule after editing an auto-tracked personal expense.
Advanced custom rules
Give future personal auto-tracked expenses familiar names and categories, or skip merchants you do not want to track. Choose a matching condition, then rename, categorise or exclude.
- Open Profile → Auto-track expenses → Custom rules → Add rule. Under When, choose is exactly, contains, starts with or ends with, then enter the text to look for.
- Under Then, choose Rename expense to, Set category to, or both. For example, a merchant containing CORNER CAFE can become Morning coffee in Food & drinks.
- Open Test this rule and try a merchant name, such as CORNER CAFE 018. Preview the expense name and category, then tap Save rule.
- Enable Auto-track expenses to see Custom rules. Edit a condition or action, or delete a rule whenever you want.
- Choose Exclude from auto-track to skip future payments from a matching merchant. When deleting an auto-tracked expense, choose just that transaction or also exclude its merchant. Manual and past expenses stay unchanged.
If a payment does not appear
A listed app is not a promise that every bank, card or alert format works. Notification wording, missing fields, operating-system restrictions and device settings can affect capture.
- Check that the bank or wallet actually sent a completed-payment alert, and that you selected that app or card in setup.
- On Android, check notification access and the connection status. On iPhone, check that the automation is enabled and that the amount, merchant or notification fields are still connected.
- Open the review list before entering a missing purchase manually. A possible duplicate may already be waiting there.
- If Wallet did not supply a usable amount or merchant, use the notification method when available or enter the expense manually. The iPhone payment-message method is not available yet.
- Open AA split online to synchronize saved expenses to your account. Check for gaps before relying on the month’s totals.
Choose what stays on your phone
Payment text is processed on the capturing phone. Raw notifications stay there; saved expense details sync to your account when you open AA split online. Android grants broad notification access, but AA split checks your selected apps before reading text. On iPhone, it receives the fields your Shortcut passes. You can pause tracking, disable an automation or revoke notification access. Sharing a redacted example to improve recognition is a separate choice that requires your confirmation.
Common questions
Is automatic expense tracking free in AA split?
Yes. Supported Singapore payment-alert capture and compatible Apple Wallet card-transaction capture are included for free. Notification tracking outside Singapore is coming soon. Manual expenses, splitting and category analytics are free, with no daily cap on manual entries.
Does AA split connect to my bank account?
No. Android uses selected app notifications; iPhone uses payment details passed by Apple Shortcuts. AA split does not request bank login credentials, move money or read a complete bank transaction history.
Can I split a payment as soon as it is captured?
Yes. Open the saved Personal expense and choose Split bill. Use Split total to share the amount with a group, or Itemized splitting to scan the receipt and send its items to a group or a one-time meal. Check the shares before saving. If the alert is waiting for review, save it as an expense first.
Can the website capture payment alerts?
No. Automatic capture needs the installed Android or iPhone app and the required permissions or Shortcuts automation. Saved expenses can sync to your account and be viewed on the web.
Will every purchase be tracked automatically?
No. Coverage depends on your phone, bank or wallet, alert format and setup. Missing or ambiguous details may need review or manual entry. Check your recorded purchases before relying on a spending total.
What is a custom rule for automatic expense tracking?
A custom rule applies only to your future personal auto-tracked expenses. Match the whole merchant name, text anywhere in it, its beginning or its ending. Rename matching expenses, set a category, or exclude the merchant from future auto-tracking. For example, contains CORNER CAFE can rename CORNER CAFE 018 to Morning coffee in Food & drinks. Create and test rules in Profile → Auto-track expenses → Custom rules → Add rule, or ask AA assistant and review before saving. Manual entries, group expenses and past expenses stay unchanged.
Phone app availability is listed on Get the app. Privacy notice